Reinstalling default firmware
This is a guide for reinstalling default firmware on a non-responding PCB. Only follow the steps in this guide if you’ve been directed here from our troubleshooting Wi-Fi guide, or if you have the following issue:
The led light and main fans turn on – but not the screen and the paddles are not moving. The issue is that the firmware has somehow been made corrupt and a new version needs to be installed.
Procedure
The first step is to see if the firmware can be fixed by entering “safe mode.”
If putting the roaster into safe mode doesn’t work, proceed with reinstalling the firmware.
Requirements:
USB-A or USB-micro.
Computer
Step 1: Download and install the CLI tool
For windows: Windows CLI installer
For Mac/Linux: Installing CLI on a Mac
Step 2: Connect with usb
Connect the USB to the roaster. If you have a USB-A, there is a slot in the back of the roaster. If you want to use a USB-micro, remove the USB from the PCB and insert yours. See the pictures below if you are unsure.
Step 3: Open Command Prompt/Terminal
On Windows
Click on ‘Start’ or press the Windows button, type cmd in the search bar, and open the program.
On Mac
Click the Launchpad icon in the Dock, type Terminal in the search field, then click Terminal.
Step 4: Log into Particle
In the command prompt/Terminal app, write
particle cloud loginand press enter.
Wait for a few moments for the program to start, and then enter login information when prompted. You can create your own login at particle.io if you wish, or just use the credentials from our demo account:
Email: roest@gmail.com (not an actual email)
Password: roest321
It should look like this once done:
The cd.. was used only to go to the root folder for better visibility and is not essential.
Step 5: DFU-mode
Turn on the roaster and put it in DFU mode:
In the command prompt, write:
particle usb dfuYou will get the message “Done” if it is successful.
If this doesn’t work, then do it manually:
Press and hold both the RESET and SETUP buttons simultaneously.
Release only the RESET button while holding the SETUP button.
Release the SETUP button once the device begins to blink YELLOW
Step 5: Particle update
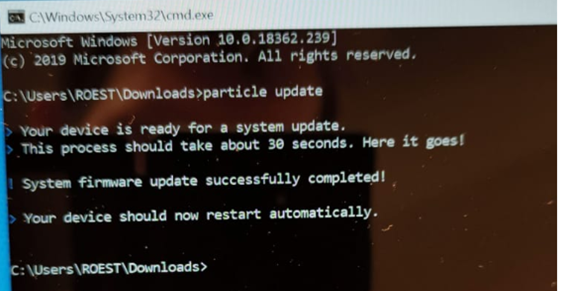
The first test is simply writing
particle updatein the command prompt and pressing enter.
After this step, your roaster might start to work again. If it’s still unresponsive, continue to the next step.
Step 6: download system files
Download the following files
In the command prompt or Terminal, enter the folder where you downloaded the files.
On Windows
Open the folder with the files, and click the address bar (as shown in the picture below)
Write cmd and press enter.
The command prompt is opened automatically in the correct folder, like in the image below.
On Mac
In Finder, locate the folder containing the firmware.
Right click (or hold the Mac button and click) on the folder, go to ‘services’, then click ‘New Terminal at Folder’.
Step 7: enter DFU mode
Enter DFU mode again: (Write “particle usb dfu” in the command prompt, or follow the instructions in Step 5 above to enter DFU mode manually).
When the device is in DFU mode, run these three lines: (copy each one into the command prompt and press enter)
particle flash --usb p1-system-part1@2.0.1.bin
particle flash --usb p1-system-part2@2.0.1.bin
particle flash --usb ROEST-default-firmware.bin
This will update the device to DeviceOS 2.0.1 and install our firmware.
The device should automatically restart and connect to Wi-fi.
It should look like this (just with 2.0.1 instead of 1.4.4 and ROEST-default-firmware.bin instead of p1-tinker@1.4.4.bin):
The microprocessor now has the default firmware. You might have to restart.


