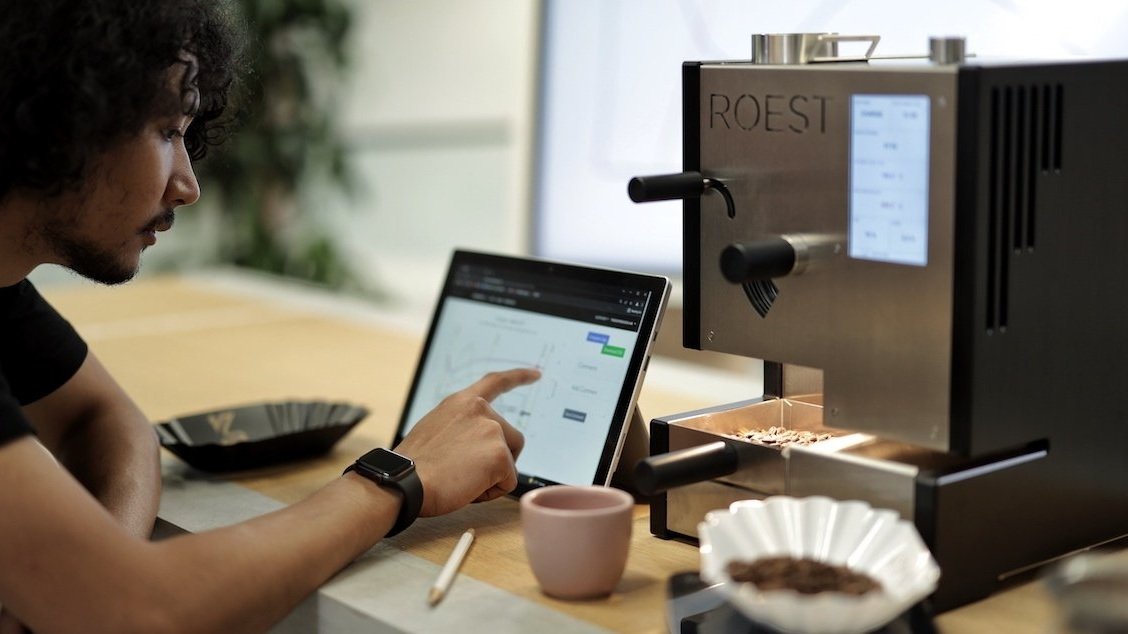
Adjustable roasting parameters
There are many parameters you can adjust before or during roasting. You will find some of them on the main touchscreen, the rest are located in ROAST SETTINGS.
Sections:
Main screen parameters
These are the adjustable parameters located on the main screen of your roaster.
1. DEVELOPMENT TIME. You can change the development time during the roasting process without switching to manual mode. Tap on DEVELOPMENT TIME and adjust the time using the rotary knob. Once “First Crack” is registered, the timer will start and cannot be changed. By tapping the countdown, you can cancel the auto drop and drop the beans when you want to.
2. AIR TEMPERATURE (ET).
This is the primary variable for adjusting a roast. The sensor sits in the upper mid-section of the drum. This temperature responds very rapidly to changes in heat input. If adjusting the ET, you will switch to manual mode (Manual ET Profile).
3. BEAN TEMPERATURE (BT) AND DRUM TEMPERATURE
Instant temperature measurement of the bean surface. Adjusting BT on the screen will not switch to manual mode. Instant measurements of the drum temperature are also visible below the BT temperature.
4. FAN.
The fan setting changes the speed of the exhaust fan. Note: If you have a fixed ventilation hose out of the room and smell roasted coffee, this can be because the exhaust fan setting is too low.
IMPORTANT: The higher the airflow, the more energy is used in temperature-based profiles. More increased airflow will have an impact on the roasting time. However, the effect is not as significant as you might have experienced with traditional open drum roasters. We suggest adjusting the temperature or power to adjust the total roasting time. We have roasted great coffee on both low and high airflow. It depends on the profile overall – and of course – the coffee.
5. POWER.
When controlling the power, any changes made to the power percentage on the screen is directly changing the power input to the heating elements. You will switch to manual mode if manually adjusting the power (Manual Power Profile).
Roast settings parameters
These are the adjustable parameters located in your roaster via ROAST SETTINGS.
1. REDUCE PWR AFTER FC.
If you roast using a Power profile, this setting can automatically reduce the power after a First Crack event has been registered.
For example: if the power setting in the profile is 80%, then a 10% reduction would mean that the power is reduced to 72% (10% of 80% power is eight percentage points).
Watch this video to learn more about this useful feature.
2. WAITING TEMPERATURE (charge temperature).
The starting air temperature for Power Profiles. You can set a preheat temperature when creating a profile as well, but if you wish to vary between batches, for example, you can leave that field blank and just adjust from the screen in between batches instead.
IMPORTANT: The waiting or charge temperature is set in the profile creator for temperature profiles. Depending on the profile, it can be beneficial to have a higher or lower starting temperature than the profile itself. A high charge temperature will increase the conductive heat transfer at the beginning of the roast, as the roasting chamber will store more heat. A lower charge temperature will help reduce energy consumption if the machine is idling for more extended periods between roasts and will also shift the heat transfer more towards convection in the beginning.
3. DEVELOPMENT (AUTO DROP) SETTING.
Choose between percentage (%) and seconds (SEC) for development time after First Crack. If percentage is used, the development time will be calculated from the total time.
4. MAIN MOTOR SPEED.
Manual adjustment of the drum speed. It can be adjusted at all times during a roast without switching to manual mode.
IMPORTANT: Changing the Main Motor Speed (RPM) of the paddles agitating the coffee will have a much more significant impact on the roast than changes made to the airflow. Initially, higher RPM equals a faster roast. With higher RPM, the coffee is “thrown” into the hot air and spread more evenly in the chamber. With higher RPM, the coffee will be exposed to the hot air more efficiently. Still, it will also impact the precision of the bean temperature sensor since the sensor will pick up hot air and bean surface temperatures.
5. BUZZER TEMPERATURE.
The buzzer will make a sound when a set bean temperature is reached. This is helpful if you do not want to miss, e.g., the First Crack event.
Watch the video below to see how to set up the Buzzer on your roaster.
6. YELLOWING BT THRESHOLD.
The bean temperature which must be reached for ROEST to mark a Yellowing event. Note: It is set at 175 degrees Celsius by default which is valid for a 100g profile. If you roast a different batch size, you should adjust it.
7. FIRST CRACK DETECTION.
If you have purchased a ROEST sample roaster with the FC detection system, tap ON to activate this feature. Here you can adjust the following parameters:
7.a. BT Threshold: Bean temperature that has to be reached in order for First Crack detection to start registering single cracks.
7.b.Trigger count: You can choose how many cracks are needed in order to register the First Crack event automatically. We recommend 3-5 cracks.
Parameters that will not affect automatic mode
The following parameters can be adjusted without switching to manual mode:
Development time
Fan
Reduce PWR After FC
Development time (Auto drop)
First Crack settings (BT threshold and Trigger count)
Main motor speed (RPM)
Parameters that will affect manual mode
If you are roasting in automatic mode, ROEST will switch to manual mode if you adjust the following parameters:
Air temperature
Power
However, the First Crack detection will not be affected if already active.
You can read more about roasting here.
Roaster overview
The following images show an overview of the front and back of your ROEST.
Sections:
Front overview
1. HOPPER for adding beans to the roaster.
2. BEAN CHARGE HANDLE for dropping the beans into the drum.
3. ROTARY ENCODER KNOB for adjusting settings.
4. BEAN DROP HANDLE for preheating the drum or manually releasing the beans.
5. BEAN TRIER for checking beans during the roasting process.
6. TOUCHSCREEN for full manual mode (displaying parameters and adjusting variables).
First Crack detection
The automatic first crack detection turns your coffee roaster into a fully automatic roaster delivering higher consistency between your roasts. It registers the first crack for you and finishes the roast without any assistance.
Sections:
Warning
First crack detection is meant to be a tool for data gathering and automation. The roaster can never be left alone in automated mode and requires supervision.
Benefits
Saves you time - no need to monitor the roasting process.
Increases consistency.
Turns your ROEST into a fully automatic roaster.
Easier roasting for everyone, no roasting skills required.
If your ROEST machine does not have an FC detector, you can buy it here and easily install it on your roaster.
How to turn it ON
After receiving your ROEST, the First Crack Detection is turned OFF. Follow these steps to turn it ON:
1. Tap on the time to open the menu
2. Tap on ROAST SETTINGS
3. Tap on FIRST CRACK SETTINGS
4. Turn it ON
You will see “AUTOMATIC FC” on the main touchscreen when First Crack Detection is ON
How to turn it OFF
If you want to roast without First Crack Detector, you can turn it OFF.
1. Tap on the time to open the menu
2. Tap on ROAST SETTINGS
3. Tap on FIRST CRACK SETTINGS
4. Turn it OFF
First crack settings
When turning on First Crack Detection, the following parameters can be adjusted:
BT Threshold
This setting determines the bean temperature that must be reached for First Crack Detection to start registering single cracks. It is set at 185 degrees Celsius by default. You can adjust the temperature to your liking by tapping the number and then using the rotary knob to change the value.
Trigger count
Here you can set how many cracks are needed to register the “First Crack Event” automatically. It is set at five by default. We recommend 3-5 cracks. You can adjust the number of cracks to your liking by tapping the number and then using the rotary knob to change the value.
Watch the video below to see in detail how to set up the FCD on your roaster.
Registering a first crack event
After tapping “yellowing” or after the BT threshold has been reached, the first cracks can be registered. Once the set trigger count has been reached, the Auto Drop countdown will start.
Screen during roasting
Event resgistered as First Crack
Total cracks registered automatically
ROEST automatically starts the auto drop based on the crack count settings
First Crack Detection is ON
Roasting graph
You can see the intensity of the first cracks, also known as crack rate.
All about the Wi-Fi
All you need to know about the Wi-Fi on your roaster and how to set it up.
Sections:
Wi-Fi symbols
Wi-Fi is always turned off by default when roasters are shipped. You can see the wi-fi status bar at the bottom of the screen.
IMPORTANT: If Wi-Fi is insufficient/unsuccessful, profiles might be damaged when downloaded on ROEST. Subsequently, the roaster will not follow your designed profile correctly, and the roasting log might get lost and will not be stored in the web portal.
Before using the roaster with Wi-Fi
Before connecting to Wi-Fi, ensure the drop handle is in its upward position.
If the drum is closed (bean drop handle in downward position), Wi-Fi settings will be disabled.
Using the roaster without Wi-Fi
The Wi-Fi is disabled by default when receiving the sample roaster. If you are connected to Wi-Fi and wish to turn it off, go to the main menu, then Wi-Fi settings, and press ‘Toggle Wi-Fi - DISCONN’.
You can use the sample roaster without Wi-Fi. However, you will only be able to use profiles already downloaded on your sample roaster. Also, you will not be able to follow your roasting session through the live view or view logs from sessions roasted without Wi-Fi.
Troubleshooting
If you’re having issues connecting to Wi-Fi, please see our guide on troubleshooting Wi-fi issues.
Automatic roasting
Warning
Automated mode with or without First Crack Detection is meant to be a tool for data gathering and automation. The roaster can never be left alone in automated mode and requires supervision.
Automatic roasting with First Crack Detection (FCD)
When receiving your ROEST, the First Crack Detection is switched off. Before roasting, you must turn it ON to activate it.
ROASTING
Once the machine has reached the target temperature for the selected profile (or waiting temperature when using a Power profile):
1. Add green beans to the hopper and pull the charge handle. Make sure all the beans enter the roasting chamber.
2. When First Crack Detection is ON, beans are roasted from the start until the end without any action needed. Wait for ROEST to release the beans in the cooling tray and let the beans cool down for about 90 seconds. You can start a new roast while the beans are cooling.
You can override the Development Time countdown if you want to release the beans immediately. Tap the Development time countdown area, and the automatic drop is canceled and “DROP NOW” enabled. Tap again to release the beans.
Automatic roasting without First Crack Detection (FCD)
ROASTING
Once the machine has reached the target temperature for the selected profile (or waiting temperature when using a Power profile):
1. Add green beans to the hopper and pull the charge handle. (Make sure all the beans enter the roasting chamber).
2. When you hear cracks, you must manually register the First Crack event: Tap “Next Event: FIRST CRACK”.
Tap “NEXT EVENT” in the upper left corner of the main touchscreen until you see FIRST CRACK.
3. When the development time countdown is over, ROEST releases the beans into the cooling tray. Let the beans cool down for about 90 seconds. Collect the beans or add another round of beans and start roasting while the previous batch is cooling down.
Watch the video below with detailed steps of automatic roasting without First Crack Detector.
From auto to manual and back
When you roast in automatic mode, and you intentionally or by accident adjust a parameter (power or temperature) that turns on manual mode, you can still go back to automatic mode by going to profiles and selecting the profile you are roasting with again.
Manual roasting
Manual roasting is available for Power Profiles and Air Temperature (ET) profiles. We recommend using Power Profiles for manual mode.
Sections:
Important information
• If the air temperature is adjusted while roasting with a Power profile, the profile will turn into a manual ET profile.
• You can use automatic First Crack detection while roasting in manual mode. Even when roasting manually, it will register the First Crack and start the automatic countdown. If you want to perform a fully manual operation, turn First Crack detection off.
Manual roasting with power profile
PREHEATING
1. Select a power profile, close the drum and wait for the roaster to have reached the waiting temperature.
2. If you want ROEST to automatically register the First Crack, turn on First Crack Detection.
3. You can adjust the waiting temperature if you wish:
ROASTING
Once the machine has reached the WAITING TEMPERATURE, you are ready to start roasting.
1. Add green beans to the hopper and pull the charge handle.
2. By adjusting the power, you will switch to the Manual PWR profile - tap on POWER and use the rotary knob to change the value.
You are currently in Manual Mode. Read about all parameters available to adjust in the article “Roasting parameters”.
When the First Crack Detection is on, ROEST automatically registers the FC - even when roasting in manual mode.
3. End the roasting process your preferred way. See the three ways how to end a roast here.
4. Collect the beans or add another round of beans and start roasting while the previous batch is cooling down.
Manual roasting with Air Temperature (ET) profile
PREHEATING
1. Complete the “BEFORE ROASTING-PREHEATING” steps to select an ET profile.
2. If you want ROEST to automatically register the First Crack, turn on First Crack Detection.
ROASTING
Once the machine reaches the targeted temperature, you are ready to roast.
1. Add green beans to the hopper and pull the charge handle. (Make sure all the beans enter the roasting chamber).
2. By adjusting the Air Temperature (ET), you will switch to the Manual ET profile - tap on AIR TEMP and use the rotary knob to change the value.
You are currently in Manual Mode. Read about all parameters available to adjust in the article “Roasting parameters”.
When the First Crack Detection is on, ROEST automatically registers the FC - even when roasting in manual mode.
3. End the roasting process your preferred way. See the three ways how to end a roast here.
4. Collect the beans or add another round of beans and start roasting while the previous batch is cooling down.
How to download profiles
If you wish to download library to your ROEST, follow these easy instructions:
1. Login into the Web Portal with your username and password.
2. Click on Profiles, located on the main menu.
3. To assign new profiles, scroll down to “Assign To Slot” and click on the arrow on the far right for the profile you wish to assign (there is a limit of five profiles assigned to your roaster). Click on the arrow facing downwards on your assigned profiles to remove them from the machine. See below.
If you have already assigned five profiles to your machine, a message will be prompted telling you to replace one of the existing profiles with the new one.
4. Connect ROEST to Wi-Fi.
5. Go to your profile library in the roaster and download assigned profiles by tapping DOWNLOAD in the lower right corner.
Wait for profiles to download. The Sample Roaster will fetch the assigned profiles. Tap on “TAP TO CLOSE THIS WINDOW” when completed. If you’re updating your roaster with previously downloaded profiles, the list will simply be updated, and not spend time downloading the profiles again.
You can read more about roasting profiles here.
About roasting profiles
All you need to know about the roasting profiles of your ROEST.
Sections:
Type of profiles
There are four main roasting profiles available:
Air temperature profile - often abbreviated ET (environmental temperature)
Power profile
Inlet temperature profile
Bean temperature profile - often abbreviated BT
ET and BT profiles start roasting with a temperature defined in profile creation. Power and inlet profiles have a waiting temperature (charge temperature) specified in “ROAST SETTINGS” on the touchscreen, where you can change it from the default 180C. For all profiles, you can set a preheat temperature in profile creation instead if preferred.
Library of profiles
After ordering the ROEST sample roaster you will receive an email with your username and password.
To access the library, login into the Web Portal (you can read how to do it here), go to the Main Menu and click on Profiles.
As you can see in the image below, the library is divided into two sets of profiles: “Assigned Profiles” and profiles to “Assign to slot”.
1. Assigned profiles – profiles (up to 5) downloaded to your roaster’s library.
2. Assign to slot – all profiles you have created or downloaded that are yet unassigned.
3. “Created by...” shows the original creator of the profile.
4. Type of profile - ET, BT, or power profile.
5. “Share profile” - tap to generate a link that can be shared with others.
6. “Show share link” - tap to receive the link for your profile, which can be shared with other ROEST users.
7. “Create new profile” - Editor for creating new profiles.
Selecting profiles
These three quick steps will take you to the list of downloaded profiles.
1. Go to the Main Menu
2. Tap “PROFILES”
3. Select a profile
After that, you will automatically be directed back to the main screen, and the roaster will start adjusting the parameters to the selected profile. Once it reaches the target temperature, the roaster is ready to roast.
Creating profiles
Follow the instructions in this guide if you wish to create a new profile.
Downloading profiles
The roaster can store a maximum of five profiles at a time. If you wish to change any of them, log into the Web Portal and assign new profiles. Once assigned, return to your roaster and tap “DOWNLOAD.” Now you have the new profiles added to your roaster.
A more detailed guide on downloading profiles can be found here.
Sharing profiles
Go to your library and find the profile you want to share.
The button “Share profile“ will appear on the right if it is the first time sharing this profile.
If the profile has been shared before, the button “Show share link“ will show instead.
First time sharing the profile - click on SHARE PROFILE
1. Click on "generate share link"
2. Your share link will appear at the top of your profiles screen.
Profile previously shared - click on SHOW SHARE LINK
Copy the generated URL and share the profile as usual.
How to create a profile
Instructions
1. Login into the Web Portal with your username and password. After ordering the ROEST sample roaster, you will receive an email with your username and password.
2. Click on “Profiles” located on the main menu, under the picture of your roaster.
3. Click on the “+” sign on the right, next to the search box.
4. Choose a profile type from the menu that appears.
Which types of profile are available depends on which model of machine you have.
4. You will land on the page shown below.
A. Give your profile a name.
B. You can set a preheat temperature if you wish. If none is given, it will preheat to the temperature of the first point in your profile. If roasting with a power profile, it will preheat to the chosen waiting temperature (found in roasting settings) if not given a preheat temperature.
C. You can choose from four different end conditions. Development time and bean temp can also be changed on-screen during roasting, but total roast time cannot.
D. You can add extra information about the profile (called ‘metadata’) if you wish.
You can also load a previous profile or roast curve to load in the background as a reference when designing your profile. Click on ‘Compare Profile’ and you will be given the option to load a profile or roast batch as your reference.
E. You can edit multiple parameters in each profile. Switch between parameters with this drop-down menu.
How to create a curve
1. Choose the parameter you want to edit by choosing from the list or clicking on the line you want to edit. You’ll be starting with two points already; a starting point and an ending point. Both of these can be edited but not deleted.
2. To add a point, tap “ADD POINT”.
3. Adjust the time and the corresponding unit of your chosen parameter and tap OK.
SHORTCUT:
Add a point by double-clicking directly on the line.
Then edit the point by clicking and dragging the point to the desired position, directly on the graph.
4. Continue adding points. The curve will be shaped based on your added points.
5. Continue adding points for all parameters.
6. Before you can save, remember to give your profile a name.
If you want the created profile to be downloaded to a roaster, read this guide.
Machine parameters
If you would like to adjust your machine settings, you can access them via Machine Setup on the touchscreen.
1. Bean cooling duration: Duration of increased speed after drop.
2. Bean cooling %: Percentage speed after drop.
3. Bean cooling idle %: Percentage speed while idling.
4. Temperature reading: Celsius or Fahrenheit.
5. Bean cooler light and Window light: Can be turned ON or OFF.
6. Cool. tray warn (BETA): Coming soon.
IMPORTANT. The bean cooling fan is always ON, but can be set to increase in speed when the coffee is dropped.
If you don’t want the bean cooling fan to increase speed after dropping, set the timer to 0 seconds or the fan speed to the same rate as the idling speed.
Chaff drawer
The ROEST Sample Roaster collects chaff inside the drawer. It is made of 0.7-millimeter thick stainless steel to reduce weight and is placed behind an airtight foam.
Sections:
Airtight foam
The foam placed in front of the chaff drawer is critical for functionality; it is there to create the needed vacuum. Always replace the foam correctly. Do not throw it away.
If you need to buy a new foam, you can do it here.
When to empty the chaff drawer
The chaff drawer must be emptied after every 25 roasts.
Access the Main Menu via touchscreen. Tap the timer (second-row box)
See how many roasts you have completed under “CHAFF COUNTER”.
In addition, the chaff collector symbol on the bottom left will let you know and start blinking.
How to empty the chaff drawer
1. Turn OFF the roaster after cooling it down.
2. Remove the foam and empty the chaff collector.
3. Place the foam back in the correct position.
4. Turn ON the roaster.
5. Reset the chaff counter in the settings.
Precautions
Always turn off the roaster when emptying the chaff drawer. Otherwise, the fan will suck chaff into the impeller and reduce functionality.
The edges of the drawer can be sharp, handle with care.
Always replace the foam in the correct position. Notice the angled side. If not, the chaff will go into the impeller (fan-blades), and the fan will not perform optimally. Click here to buy a new foam if it is damaged.
Ventilation
Ventilation should always be attached before using the roaster. Ensuring proper ventilation is important for better functionality and to create a healthy and safe working environment.
Sections:
Ventilation options
It is recommended to use a flameproof metal hose with a diameter of 80 millimeters and no more than 3 meters long to ensure proper ventilation. The ventilation hose is easily attached to the back of the roaster - that’s all it takes to “install” the ventilation system for your ROEST.
A standard 80 millimeters hose of 1.5 meters in length is included in the package.
We also provide other ventilation options for your ROEST sample roaster:
3 meters ventilation hose
If you need extra length to direct the fumes outside of an opened window or for attaching to your internal ventilation system.
90 degree elbow
For directing the fumes to the sides towards the window or away from the walls.
How to use the HOSE
Stretch and cover the ventilation exit with the hose, and tighten with the clamp included with the roaster. Direct fumes outside through an open window or to an internal ventilation system.
How to use the ELBOW
The elbow is easily inserted into the ventilation exit and does not need a clamp. Direct the airflow away from the walls and towards a window - works both sideways and upwards.
Safety precautions and ventilation requirements
If hot air from the ventilation exit hits the wall (if the wall is too close), the roaster is not adequately ventilated, and there is a risk of overheating. In this case, the heating element will shut down as a safety measurement to avoid a fire within the roaster.
Ensure that the fan gitter on the back for the cooling fan is not blocked by any means, as well as the ventilation/cooling holes on the side and the back.
The roaster must stand on its four legs with free air passing under the roaster.
The roaster has powerful fans accessible for cleaning at the back. The impellers (fan blades) can create injury to hands/fingers. Never place your hands or fingers inside the ventilation exit hole.
If a coffee bean or something similar gets sucked into the ventilation, it will be ejected (shot out) at high speed from the ventilation exit hole. Therefore:
Never look inside the ventilation exit hole when the roaster is ON.
Never place the roaster with the ventilation exit hole facing people or animals.
We recommend always using a ventilation hose to direct the airflow towards an open area, ideally outdoors.
The roaster has multiple areas that get very hot. Therefore:
For safe operations, only use the handles, touch screen, and rotary encoder knob to operate the machine. Touching the hot surfaces may cause injury.
The hottest places on the roaster are shown in the images below.
Be aware that other parts might get hot. Show caution.
Roasting from start to end
How to roast in 6 quick steps
1. Close the drum to preheat (drop handle in downward position)
2. Select profile: tap on timer -> Select Profiles
3. Charge beans to start roasting
4. Register first crack
5. Bean drops automatically after the set development time
6. Open the drum to cool down the machine, or keep it closed to continue roasting
2.a. Connect to Wi-Fi. Read how to do it here. If you wish to download new profiles, watch live view on Web Portal or store roasting logs, you must be connected.
(Skip step 2.a. if you are using ROEST without Wi-Fi).
2.b. PREHEATING: Close the drum by moving the drop handle to the downward position.
3. Select a profile.
1. Go to the Main Menu
2. Tap “PROFILES”
3. Choose a profile
The roaster will start preheating to reach the target temperature of the chosen profile. The roaster is ready for roasting once it has reached the target, which will take a few minutes.
To learn more about roasting profiles, read here.
Start roasting
When the drum has preheated to the target temperature:
1. Add green beans in the hopper and pull the charge handle (make sure all the beans enter the roasting chamber).
2. The roasting process has started.
During roasting
The automatic mode is set by default on your roaster. However, you are always free to change to manual roasting:
1. Adjust power or air temperature while roasting to switch to manual mode.
2. When you hear the cracks, tap the “First Crack” button (unless your roaster has a First Crack Detection system).
ROASTING EVENTS
Read here to learn about the three types of events you can register while roasting.
3. Manually open the drum by moving the drop handle to the upward position. If you want to do another roast, close the drum again.
You can start a new roasting process while the beans are cooling down, with the same profile, or by selecting a new one.
IF YOU’RE DONE ROASTING: cool down the roaster and turn it off.
1. Open the drum by moving the drop handle to the left upward position.
2. Wait for the temperature to cool down to about 45 degrees Celsius.
3. Turn off the roaster.
4. Empty the chaff drawer (Note: remember to reset the chaff counter next time you turn on the roaster).